
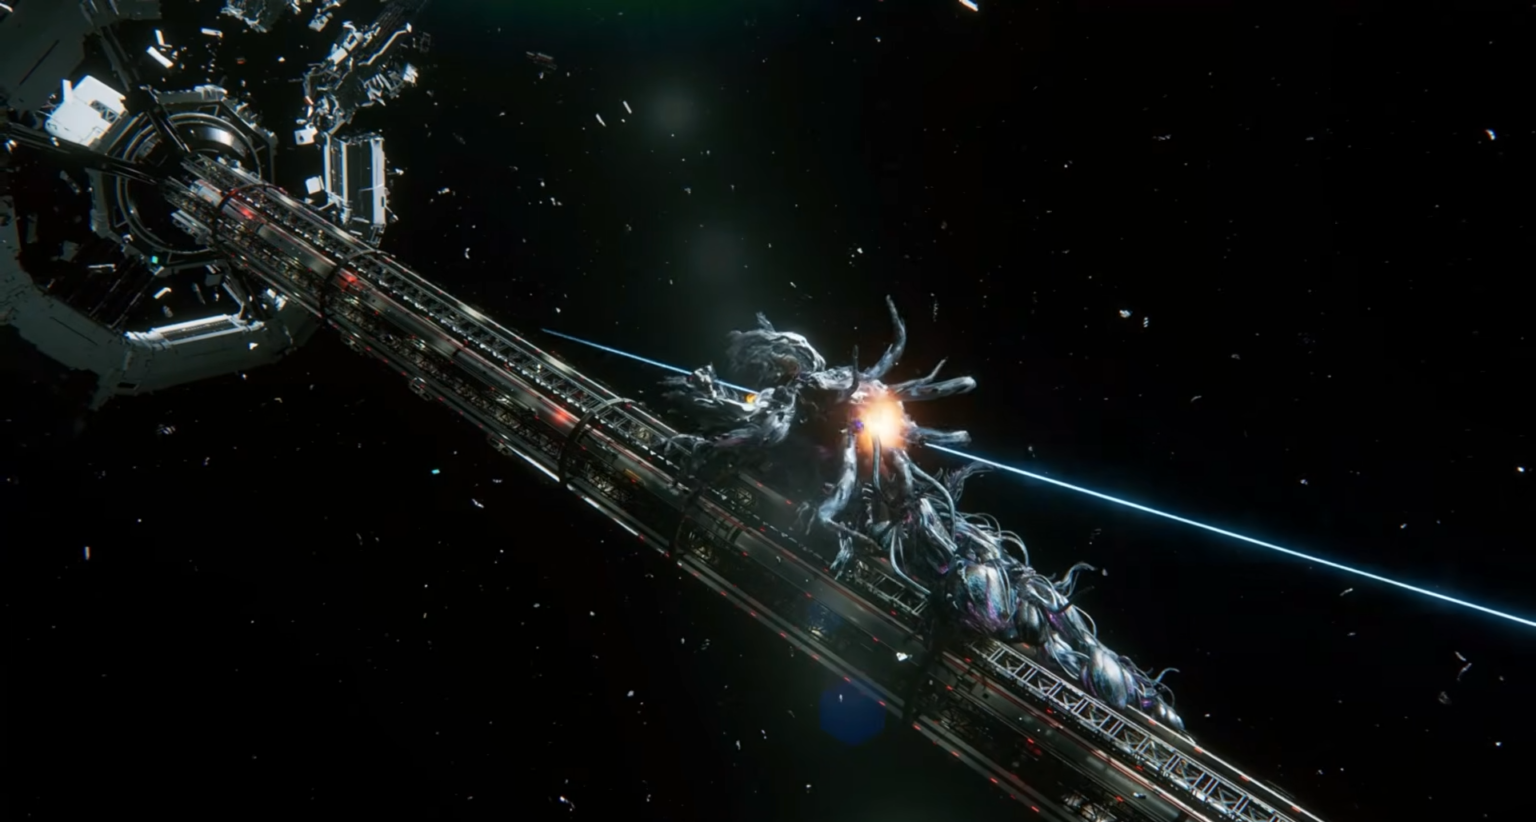
In Pragmata, the Abiosis Dead Filament serves as the true final boss (also called Dead Filament true final encounter). This cinematic, scripted sequence occurs right after the main final boss (“Eight”) during the escape to Earth. Dead Filament — the corrupting red crystal/filament mass tied to the story’s threat — reforms and chases Hugh and Diana, forcing one last desperate stand to prevent it from following them back to Earth.
Unlike earlier boss fights that emphasize hacking combos, mobility, and weapon synergies, this encounter is a cinematic on-rails turret/cannon sequence mixed with light movement and timing checks. It tests composure, prompt reading, and basic aiming rather than complex builds.
This guide covers the exact location, mechanics, step-by-step phases, best strategies, timing tips, and all rewards for defeating Abiosis Dead Filament.
Abiosis Dead Filament Boss Location
The encounter triggers on the exposed rail platform leading to the tower-top transports and cargo shuttle, immediately after the “Eight” final boss and the realization that Dead Filament is surging back.
- It is a linear escape path: cannon emplacement → rail ride → final shuttle approach.
- Dead Filament dominates the background as a massive, pursuing mass of corruption.
- You cannot skip or miss it — it is required to reach the true ending and escape sequence.
Return to the Shelter one last time before the final push for any remaining upgrades, though gear matters less here than in previous fights.
Dead Filament Mechanics
This is not a traditional combat arena fight. Key elements include:
- Cannon Sequence: A heavy rail-mounted cannon that Diana helps charge. You aim and fire only on specific prompts.
- Chase Phase: Light movement and survival while approaching the shuttle.
- Hacking Support: Diana optimizes her matrix for a final disruption.
- Failure Risks: Missing charged shots, hesitating on “Shoot!” prompts, or taking too much damage from lunges during the chase.
- Core Objective: Fully charge and fire the cannon multiple times to disperse the mass, then survive the closing gauntlet for Diana’s final hack intervention.
Visual and audio cues (dialog from Diana and Hugh) drive the rhythm. The large size of Dead Filament makes aiming forgiving if you stay centered.
Phases and Step-by-Step Breakdown
The encounter divides into two main sections: the Cannon Sequence and the Final Chase/Hacking Sequence.
Cannon Sequence (Main Dispersal Phase):
- Opening Phase — Hugh spots the returning Dead Filament and suggests using the cannon. Diana begins charging it. Dead Filament stays at mid-range initially.
- Charge Phase — Wait patiently as Diana says “not yet” or “a little more to go.” Keep your reticle centered on the mass (it is a huge target).
- Fire Phase — When Diana calls “Ready, shoot!” (or similar prompt), fire immediately in the brief window. A clean hit triggers Hugh’s reaction (“Got you! This is insane”).
- Repeat Cycle — After the first shot, Dead Filament reacts (“This isn’t over yet”) and escalates with more visual chaos and closer approaches. Repeat the charge-and-fire process 2–3 times total under increasing pressure. Maintain aim discipline — do not spam or fire early.
Final Chase and Hacking Sequence:
- Survive Lunges — Even after cannon fire weakens it, Dead Filament continues lunging as you move toward the shuttle. Focus on positioning and timely reactions to avoid heavy damage.
- Diana’s Hacking Window — Diana announces she is “optimizing hacking matrix” and succeeds (“I did it!”), disrupting the filament. Hold steady and react to any residual prompts.
- Final Intervention — After a tense moment (“No, not like this”), execute the closing action (short interactive prompt or confirmation). Hugh’s line (“Here we go… That should do it”) signals success and neutralization.
The entire sequence is heavily scripted with dialog and visual cues guiding every step.
Best Strategy and Timing Tips
- Stay Calm and Patient: The biggest challenge is not panicking during charges or visual chaos. Resist the urge to fire early — wait for Diana’s explicit “Ready, shoot!” prompt.
- Aiming Tips: Keep the reticle near the center of Dead Filament’s mass. Small corrections are enough; it is designed to be hittable with centered shots.
- During Chase: Prioritize survival over aggression. Simple movement and dodging lunges suffice while progressing toward the shuttle.
- Trust Diana: Let her handle charging and the final hacking matrix — your role is precise timing and composure.
- No Complex Loadouts Needed: Prior upgrades (Hacking, Suit, Thrusters, and mods like Performance Boost) from earlier sectors help with general survivability, but this fight emphasizes prompt reading over combat tech.
- Difficulty Note: Easier on lower difficulties due to more forgiving windows. On Lunatic, hesitation or missed shots punish more harshly, but the core rhythm remains the same.
Pro Tip: Treat it like a quick-time event with aiming — read every line of dialog and stay focused on the reticle.
Rewards for Defeating Abiosis Dead Filament
Completing this encounter provides strong narrative and progression payoffs:
- Story Resolution: Dead Filament is permanently destroyed, ensuring it cannot follow Hugh and Diana to Earth and unleashing corruption on the planet.
- Character Arc Closure: Reinforces the Hugh-Diana partnership and Diana’s growth through her hacking resolve.
- Progression Unlock: Opens the concluding escape sequence, cargo shuttle segment, and full ending scenes (including potential variations based on overall playthrough performance).
- Trophies/Achievements: Unlocks story-related late-game trophies tied to clearing the final chapter and honoring the promise with Diana. Required for 100% completion and related endings.
- Thematic Payoff: Provides closure on the Dead Filament corruption mechanic (red crystals/barriers seen throughout the game) and ties back to earlier story beats.
No major item rewards (like new mods or weapons) drop here — the focus is on cinematic resolution and ending access.
Preparation Tips Before the True Final Boss
- Finish any remaining exploration, Stamp Club boards, or upgrades in the Shelter.
- Ensure comfortable aiming controls (controller or mouse sensitivity).
- Mentally prepare for a scripted, prompt-heavy sequence rather than a free-form boss fight.
- This encounter ties directly into multiple endings — thorough playthroughs (high exploration, strong performance) may influence post-credits scenes or sketches.
If you’re stuck on timing a specific “Shoot!” prompt, the chase lunges, or want details on how this affects different endings (including 100% Unknown Signal mode), provide more details for targeted help!
The Abiosis Dead Filament true final boss delivers a satisfying, high-stakes cinematic climax in Pragmata that emphasizes teamwork and composure. Nail those cannon shots, trust Diana’s hacks, and secure your escape from the Moon — you’ve earned the full ending!